Tuesday, November 20, 2012

Apple Fritter Cake


So, here's my thinking ... This Apple Fritter Cake tastes just like an Apple Fritter doughnut, Apple Fritter doughnuts are doughnuts, it is acceptable to eat doughnuts for breakfast therefore it is okay for me to eat this Apple Fritter cake for breakfast; right?  Yeah, my husband didn't buy my logic either.

I definitely could eat this for breakfast, though; lunch and dinner, too.  It is so good.  The applesauce makes the cake extremely moist and I love the soft cinnamon-y apple center and the crispy glaze on top.

The only thing I think I'll do next time is double the amount of apples that I use.  I used 1 heaping cup of sliced apples which looked like enough but I want to be able to find a piece of apple in every bite so next time I'll use more.


For the Filling:
  • 1 heaping cup of sliced apples (next time I plan on using 2-3 apples)
  • 1/3 cup sugar
  • 1/4 teaspoon cinnamon
  • small pinch of nutmeg
  • 2 tablespoons cornstarch
  • 2 teaspoons water
Plus
  • 1/2 cup brown sugar
  • 1/2 teaspoon cinnamon

For the Cake:
  • 1/3 cup butter
  • 3/4 cup sugar
  • 1/2 cup applesauce
  • 1 teaspoon vanilla
  • 2 eggs
  • 2 1/4 cups flour
  • 1 teaspoon baking powder
  • 1 teaspoon baking soda
  • 1 teaspoon salt
  • 1 teaspoon cinnamon
  • 1 cup plain Greek yogurt (you could also use regular yogurt or sour cream)

For the Glaze:
  • 2 cups powdered sugar
  • 1 teaspoon vanilla
  • 6 tablespoons milk


To make the filling:
          Combine the apples, sugar, water, cinnamon and cornstarch in a small saucepan.  Cook on low heat for 10 to 12 minutes, stirring constantly until the sauce is thickened and the apples are soft.  WATCH OUT because once it starts to thicken, it'll burn quickly.  Set aside to cool.


          In a small bowl, mix the brown sugar and the cinnamon together until well combined and set aside.

To make the cake:
          Preheat the oven to 350'.  Grease and flour a 9x13 baking dish.  Set aside.

          Cream the butter and sugar until it's light and fluffy, about 3 minutes.  Add the applesauce and vanilla and mix until combined.  Add the eggs, one at a time, beating well after each addition.

          Sift the dry ingredients together.  Add the dry ingredients to the batter in three parts alternating with the yogurt in two parts, beginning and ending with the dry ingredients.  Beat until just combined.

          Spoon half of the batter into the prepared pan.  Spoon the cooled apple mixture over the batter and spread as evenly as possible.  Sprinkle 2/3 of the brown sugar cinnamon mixture over the apples and cover with the rest of the batter.  Sprinkle the rest of the brown sugar sinnamon mixture over the top.

          Bake for 45-55 minutes, or until a toothpick inserted into the center of the cake comes out clean.

To make the glaze:
          While the cake is baking, make the glaze.  In a bowl, mix the powdered sugar, vanilla, and the milk until the glaze is desired consistency.  When the cake comes out of the oven, immediately but carefully pour onto the hot cake.  Try to pour as evenly as possible.  Pick up the cake and tilt it to allow the glaze to run over the entire cake.  If it runs into the corners, carefully pour the glaze back into your bowl and then re-pour it onto the cake.  Let the cake sit until the glaze has hardened.


ENJOY!!!


Source: The Nerdy Baker


Wednesday, November 14, 2012

Glazed Spice Muffins


Six parents, sixteen children, thirty-six grandchildren.  Needless to say, we attend a lot of birthdays throughout the year.  Every party is enjoyable and we love to get together with the family but that is A LOT of birthday cake.  While we do enjoy eating cake, 5 times a month (actually it works out to be more than that some months) is a little much.  It's so sweet and the frosting is so rich; but how do you tell a child that they should choose something besides a cake, for their birthday?

I made this "muffin" looking for a way to reduce the sweetness while still being able to call it a cupcake.  The secret is the amazing glaze on top.  The glaze is sweet but it's not as thick as frosting or as heavy.  The cake itself is a little denser than regular cake so you get less crumbs all over the floor (a huge plus in my book) and it's not as sweet as a regular cake, so it seems to please adults. 


For the Muffins:
  • 1/4 c butter
  • 1/4 c canola oil
  • 1/2 c granulated sugar
  • 1/3 c brown sugar
  • 2 large eggs
  • 1 1/2 tsp baking powder
  • 1/4 tsp baking soda
  • 3/4 tsp ground nutmeg
  • 1 tsp cinnamon
  • 3/4 tsp salt
  • 1 tsp vanilla extract
  • 2 2/3 c all=purpose flour
  • 1 c milk
For the Glaze:
  • 3 tbs butter; melted
  • 1 c powdered sugar
  • 3/4 tsp vanilla
  • 2 tbs hot water
Preheat oven to 425'F.  Line 12 muffin cups with liners or spray with cooking spray.  

In a large bowl, beat together the butter, oil, and the two sugars until smooth.  

Beat in the eggs, one at time.  With the mixer on low speed, add the baking powder, baking soda, cinnamon, nutmeg, salt and vanilla until just combined.  Stir the flour into the butter mixture alternating with the milk, beginning and ending with the flour and mixing until just combined.  Do not over-mix.

Spoon the batter into the cups, filling the cups and smoothing the tops.  Divide the batter equally among the prepared muffin cups.  

Bake until the muffin tops are a pale golden and springy to the touch, about 15 minutes.  

Cool muffins in the muffin tin for 5 minutes, the transfer to a wire rack and cool 10 minutes before glazing.

To make the glaze, in a medium bowl, mix together the melted butter, powdered sugar, vanilla and water.  Whisk until smooth.

When the muffins have cooled slightly, dip the muffin top into the glaze and allow the glaze to harden.  Once hardened, dip a second time and allow to harden then serve.


Monday, November 12, 2012

The best way to cook bacon

    Isn't bacon one of the most delicious foods out there?  I sure think so, but I hate cooking it.  I enjoy it crispy but if I cook it in a pan, it either burns or the fat is still rubbery & gross.  So, I usually cook it in the microwave between paper towels.  It doesn't burn & it gets nice & crispy but all the flavor disappears & I get something that's just mildly more flavorful that a piece of cardboard.  But, those were my only options, until now.  

    I've recently discovered baked bacon and all I can say is "WOW".  It's extremely flavorful, nice & crispy & the gross fatty parts are nice and tender.  Seriously, once you try this method, you'll never go back.

    Now, I have always used thick center-cut bacon but I would imagine that if you're going to use the thinner strips of bacon you'll want to shorten the cooking time.  Just keep an eye on it & you'll know when it's ready.  Just remember that after you pull it out of the oven, it will still cook for another minute or so.


   To do this, you're going to want to line a RIMMED cookie sheet with tin foil.  I have found that if I run a sheet down the center & then another sheet off to the left & off to the right, the cookie sheet will stay clean.  (Can we say "Yeah" for less dishes to wash?)

Lay out your bacon on the cookie sheet.  You can squeeze these right up next to each other as long as they are not on top of each other.

Put them into the cold oven & THEN turn it on to 375'.  Bake for 20 mins.  Remove from oven & let it sit until it's done sizzling or you're ready to use it.  When you do remove it, you'll want to blot off the grease with a paper towel.

And there your go.  Easy as that & you have delicious bacon.

Sunday, November 4, 2012

Creamy Bacon Carbonara

I love this dish.  It's easy to make, tastes wonderful & the kids all eat it.  There's not a whole lot to say other than, "you've just got to try it."

You can find this recipe at Get off your butt and bake.  And while you're there, check out all the other wonderful recipes on the site.


Wednesday, October 31, 2012

Happy Halloween & a Green Monster Smoothie

Happy Halloween!!!


Halloween is finally here.  The kids have their costumes, the house is decorated, the treats are bought, now the fun can finally begin.

This year, Zombie's seem to be really popular.  You see them mentioned on billboards, commercials & the oh-so-popular TV shows.  So I thought I'd share with you the music video that my extremely talented brother-in-law, Wes Nelson, created.


Wasn't that a great video?  My kids are obsessed with it.  So are you wondering where this weeks recipe is, yet?  Okay, you asked for it.  Seeing how it's Halloween, I decided to do something that sounded a little scary (although not one bit scary to eat).  Let's make a Green Monster Smoothie.


Green Monster Smoothie


This is a very simple recipe & you can alter the amounts however you like.  This is just the way that I make it.  

  • 1c milk
  • 1T peanut butter
  • 1/2c Greek Gods honey vanilla greek yogurt
  • 1 banana
  • 3c+ kale greens
  • 1c ice cubes


Throw all the ingredients into a blender & pulse.  It seems to work best if you put the ingredients in, in the order I've listed above.  Also, you'll want to pulse the blender instead of just turning it on; otherwise you'll get Green Monster soup.  And don't worry about the taste of the kale.  The other flavors mask it very well.  You could also try using spinach instead; it has a milder taste.  Spinach is just a migraine trigger for me, so I used the kale instead.

Sunday, October 21, 2012

French Onion Soup

I love the Fall.  The mountains around here are so beautiful this time of year.  I love having my windows open all day & then snuggling under my down comforter when it's time for bed.  I love the Halloween parties & Trick-or-Treaters.  In fact, the only thing that I don't like about Fall is that it never seems to last long enough.  

I also love the wonderful foods that I start to make once the weather cools down.  I mean, I know I can make any food, any time of the year but who really wants to make a hot soup or a heavy stew when it's 100'F outside.  

This last week I decided to try  making a French Onion soup.  I have always enjoyed eating it at restaurants but I've never tried making it myself.  It definitely is a recipe that needs to be planned way ahead of time but it's really simple.  I just threw my onions into the pot & went about my day (folding laundry, reading a book, vacuuming, reading a book, picking up the toys, reading a book ... you get the idea).  

You can find this recipe at Closet Cooking and check out her photographs, too.  All that melty cheese looks oh-so-yummy.  Hmm, maybe this is what I should make for dinner tonight.

Doesn't this look amazing?  And just imagine, underneath is a delicious bowl of sweet caramelized onions in a hot beef broth. 


I know this looks like a lot of onions but trust me, they will really cook down & you'll be glad you used so many.  **Hint:  They will cook down faster if you put a lid on top**


Here are the onions along with the beef broth & other seasonings.  Only thing left to do is pour it into bowls & top with the cheese.

Sunday, October 14, 2012

Old Fashioned Pancakes


I love going to IHOP & Denney's just for their pancakes.  They taste so much better than the store-bought mixes that I've always bought but I just figured that was how it was & there was nothing I could do about it.  I don't know why I hadn't thought of making my batter from scratch before but I'm so glad that eventually I thought of it.  This recipe is SO much better than any of the store bought mixes & I was even surprise to find out that I liked it a lot more than the restaurant pancakes.  Best part is that I always have the ingredients on hand & they are a lot cheaper than the store bought mixes.  I often double this recipe but then I always have a bunch left over.  I throw the extras into the freezer & then just throw them into the toaster for a quick hot breakfast for the kids.

Old Fashioned Pancakes

  • 1 1/2c all-purpose flour
  • 3 1/2t baking powder
  • 1t salt
  • 2T white sugar
  • 1 1/4c milk
  • 1 egg
  • 3T butter, melted


In a large bowl, sift together the flour, baking powder, salt & sugar.  Make a well in the center and pour in the milk, egg and melted butter; mix until smooth.


Heat a lightly oiled griddle or frying pan over medium low heat.  Pour or scoop the batter onto the griddle, using approximately 1/4c for each pancake.  


Brown on both sides and serve hot.


 Enjoy!!!


Sunday, October 7, 2012

Chicken Marsala


This recipe has now been added to my list of favorites.  It's not a quick recipe but it is easy & it tastes amazing.  My husband loved it & my 7 year old (who is extremely picky) asked if she could take the leftovers for school lunch.  The only thing that I would do differently is not cook it so long at the end.  I was trying to get dinner on the table while helping one child with homework & breaking up a fight between the other two so I ended up reducing the sauce a little more than I would have liked.  It still tasted amazing, there just wasn't as much to use as gravy for the potatoes.

You can get this recipe from Domestically Dreaming


It's that simple.  ENJOY!!!

Sunday, September 30, 2012

Tomato Cream Pasta

This is one of my "Go to" meals for when I'm in a hurry.  It tastes great, everyone loves it & it's quick & easy to make.


Tomato Cream Pasta

  • 12oz to 16oz bag Penne pasta
  • 2 - 14.5oz cans diced tomatoes with garlic & onions
  • 1 1/2c whipping cream
  • 2t Basil
  • Sauteed Mushrooms
  • grated Parmesan cheese
  • crisp bacon

Cook the pasta & then set aside.  Cook the tomatoes over medium-high heat, in a skillet, until juice is reduced (about 5 minutes).  Reduce heat, add basil, cream, mushrooms, heat through. DO NOT BOIL.  **At this point, I usually add a tablespoon of flour if the sauce hasn't thickened as much as I want it to.**   Toss with the pasta.  You can serve it with the cheese & bacon on the side or mix them into the serving bowl  just before serving.


Doesn't this sauce look delicious?

Sunday, September 23, 2012

Blackberry Lime Bars


I've decided that I need to add another category to my blog.  I think I'm going to call it "Too Good to Miss".  This category will be for those amazingly delicious recipes that do have either HFCS or PHO in them but can't be forgotten because they are just that good. 

This is one of those recipes that is just too good to give up.  It was created by my very talented friend Carrian at Sweet Basil.  It is a refreshing dessert & the lime & blackberries work really well together.  

You can find the recipe here, at OhSweetBasil.com & make sure you check out the rest of her site.  She has TONS of delicious recipes for you to try.

I Love graham cracker crusts.  So yummy.

Don't those blackberries just look wonderful?  Just have to cook it & then it'll be ready to eat.

Tuesday, September 18, 2012

It's Time to Vote!!!


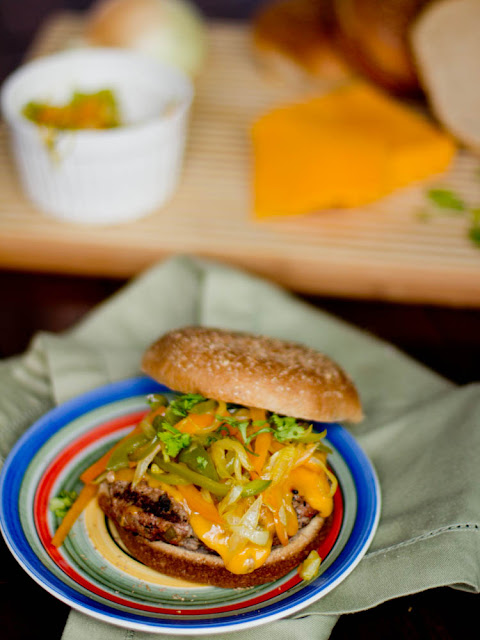
Doesn't this look delicious!!!    This recipe was created by my friend Carrian from Sweet Basil.  She's entered it into a contest at Mrfood.com & has been selected as a finalist.  She could use all the votes she can get so head on over & help her out.   Here's the link to vote.  Just click on the button in the upper right corner that says "vote now" & then vote for the Fajita Burger made by Carrian Cheney.


Sunday, September 16, 2012

Philly Cheesesteak Stuffed Peppers

This is seriously one of my new favorite dishes.  It was simple to make & it tasted amazing.  It even tasted good the next day when I reheated it in the microwave.  The recipe calls for green bell peppers but that just happened to be what Walmart was out of this week, so I substitutes red bell peppers.  They tasted great.  Next time I make this (which will be soon) I'll try the green peppers but I have a feeling I'll stick with the red peppers, after that.

You can find this recipe at Peace, Love & Low Carb

Sauteing the mushroom & onions 


Deliciously sweet red bell peppers


The filling is ready to go


Stuffed


Topped with some yummy Provolone cheese


Time to eat!!!

Sunday, September 9, 2012

Quinoa Patties

Quinoa has become the new craze in Superfoods.  What used to be just a side dish can now be found replacing rice in just about any dish.  So why not use it in a veggie burger.  

The first time I tried this recipe, I had a backup plan in mind because I just didn't think it would work out very well.  It just seemed a little too "different."  Well, I couldn't have been more wrong.  These tasted wonderful & were so filling.  My kids love them & they are another recipe where I can hide my kids veggies inside.

I got this recipe from Eating Well, Living Thin.  She also includes a recipe for a Tzatziki sauce but I just used "Some Dudes" fry sauce & it was great.


Per burger:  Calories 132; Protein 8 g; Fat 5 g; NET Carbs 12 g; (Fiber 2 g); Sugar 0 g; Sodium 200 mg


When my husband saw me mixing this, I think he got a little nervous.  As much as he wants to eat healthy, I think sometimes he gets a little worries about the foods I make him try.

You'll definitely want to use a measuring scoop to get these in the pan & then flatten them down.  Cook them on medium to medium low so that they cook through before they burn.


Sunday, September 2, 2012

Pizza Bites

Okay, so this isn't one of my favorite dinners but it's pretty good & my kids absolutely LOVE it.  Essentially they are little pizza muffins.  They are full of herbs & cheese & you can add whatever pizza ingredients that you want.  My favorite add-ins (which my kids have no idea about) are carrots & zucchini.  The herbs have a strong enough flavor that you can't even taste the veggies & if you grate them, the kids will never know they are there.

You can find this recipe at Lick the Bowl Good
As a dip, you can use pizza sauce but we chose to use this Quick & Easy Marinara Sauce from Gina's Skinny Recipes.  Trust me, once you try it you will never eat that bottled stuff again.

Sunday, August 26, 2012

Vitamin D3 supplements


I don't usually post about supplements or other health related stuff but when I run across something that has truly changed my life, I have to tell everyone about it.  

A little background information.  I've suffered from horrible migraines since my teens.  I've tried many drugs & none of them really made a difference.  The only thing I found was if I took Excedrin at the first sign of a possible migraine, I could sometimes keep it down to headache status.  I seriously was taking Excedrin everyday of my life.  After I got pregnant I had to stop taking the Excedrin & started taking Tylenol.  Tylenol helped about as much as a "Smartie" would have.  Over the last few years, it got to the point that I was averaging 2 severe migraines per week & a painful headache every single day.  The migraines would leave me extremely light sensitive, my face would droop slightly on the side the migraine was on, I was sick to my stomach, & unable to function as a mother.  

My husband was watching a lecture by Dr Stasha Gominak, about sleep disorders & vitamin D3.  While watching it, she mentioned that it could help migraines so I decided to give it a try.

I started taking 5000IU per day.  It took about 3 or 4 days before I started noticing that the headaches were lessening.  I was pretty skeptical, at first, but after the 1st month I looked back & realized that I hadn't had a single migraine.  The headaches weren't as frequent & when I did get them, they were significantly less painful & I could treat them with a single dose of Tylenol.  

It has now been over 1 year since I started taking vitamin D3 & I haven't had a single migraine!  Some days I'll forget to take my vitamin & I won't even realize it til I start to feel that old familiar tingle, telling me that a migraine will be coming in the next 24 hours.  When that happens, I take 10,000IUs & then start back onto my daily 5000IUs.  

Now I'm not telling you to blindly follow me & I know this won't help everyone but for me this is what I needed to get rid of my migraines.  Hopefully someone will read this & be able to benefit from it like I have.


For anyone interested, here are the links to Dr. Stasha Gominak's lecture.  It's pretty long so it's in multiple parts.  I confess that I haven't even watched the whole thing (even though it is very interesting).  I let my husband watch it then show me the parts relating to migraines.

Sunday, August 19, 2012

Shredded Beef Tacos

Moist & delicious & a perfect crockpot meal.


The shredded beef recipe is from Cooking Classy & you can find the recipe for my Homemade Taco Shells here.  


This shredded beef is great in tacos but you could also use if in so many other dishes.  I think it would taste great in taquitos or as a "Cafe Rio" style salad.


I love mixing my own seasonings.  They taste a lot better than just buying the pre-assembled packets from the store.  You can also control the sodium levels which are ridiculously high in those packets.


Sunday, August 12, 2012

Angel Hair with Zucchini and Tomatoes

When I was younger, I used to think that vegetarians were "crazy" for giving up meat.  I always thought that the main dish on your plate had to be the meat & the veggies were just the colorful decoration that mom  made me eat.  Now that I'm older, I've realized that even though I'm not vegetarian, it is nice to have a meal or two, each week, that doesn't have any meat in it.  I've also grow to love the same vegetables that I used to hide in my lap & sneak to the trash when mom wasn't looking.

This recipe is from Gina's Skinny Recipes which is a site that I love to cook from.  I've made quite a few of her recipes & have yet to find one that I didn't like.  I also really like how she includes the nutritional information for each recipe.  

Servings: 4 • Size: divide in 4 equal servings  Old Points: 5 • Points+: 7 pts
Calories: 254.4 • Fat: 5.7 g  Protein: 7.4 g  Carb: 51.0 g  Fiber: 7.8 g • Sugar: 2.6

Lots of onions & garlic.  Yummm!!!

The grocery store was out of fresh parsley so I substituted dried parsley.  It worked but I'm positive that the dish would have tasted even better if I had used the fresh stuff.

Lots of zucchini sticks.  

Doesn't this look wonderful.  I love how bright & colorful it is.

I have her approval.

Sunday, August 5, 2012

Spaghetti with Shrimp, Artichokes & Feta

This was a wonderful, fresh dinner for summer.  Even the kids liked it (although they wouldn't try the shrimp).  It was also easy, which is always a big plus in my book.  

The only thing I did differently from the original recipe was that I used precooked shrimp.  My reasoning?  I HATE deveining shrimp & even when I buy the ones that are already deveined, they still have "stuff" that I have to clean out.  With the precooked ones, all I had to do was pop the tails off & throw them in the pan.  If you do use the precooked shrimp, cook them for a little less time than you would if you were using the raw shrimp.

You can find this recipe at eCurry.  

Enjoy!