Sunday, August 5, 2012

Spaghetti with Shrimp, Artichokes & Feta

This was a wonderful, fresh dinner for summer.  Even the kids liked it (although they wouldn't try the shrimp).  It was also easy, which is always a big plus in my book.  

The only thing I did differently from the original recipe was that I used precooked shrimp.  My reasoning?  I HATE deveining shrimp & even when I buy the ones that are already deveined, they still have "stuff" that I have to clean out.  With the precooked ones, all I had to do was pop the tails off & throw them in the pan.  If you do use the precooked shrimp, cook them for a little less time than you would if you were using the raw shrimp.

You can find this recipe at eCurry.  

Enjoy!

Sunday, July 29, 2012

Tomato Basil Pizza

I was looking at all the food photos I've taken & I realized that I'm getting really far behind. I want to get all these recipes posted but with 3 kids I just don't have the time to type them all out.  So, in an attempt to make things easier, I'm not going to type out the recipe.  I already include the link for the site where I found the recipe so I'll just let you click that link to see how it's made.  I also think it'll help out those bloggers who are making a living by having traffic on their site.  Anyway, on to this weeks recipe.


This pizza turned out wonderful.  It is a little bit more time consuming than if you just made a pepperoni pizza but you wont be disappointed with how it takes.  You can also roast your tomatoes ahead of time if you need to.


Tomato Basil Pizza

I found this recipe on David Lebovitz's site.  The only part that I didn't use was making the crust.  I just didn't have time for that so I bought a pre-made crust from the grocery store.


My tomatoes oiled & seasoned.  I used Roma tomatoes but any smaller ones would work.


The tomatoes are finally roasted.  This took a bit longer than what David Lebovitz says it should.  Probably it's because I used larger tomatoes than he did.  In any case, just watch them until they have cooked down & caramelized.  Also, I removed the visible seeds & juice before I roasted them.


All it needs now is the Mozzarella cheese.  DON'T use the regular blocks of cheese that you would use when grating.  Get the fresh cheese that still has liquid in the package.  It tastes so much better with this pizza.

Sunday, June 24, 2012

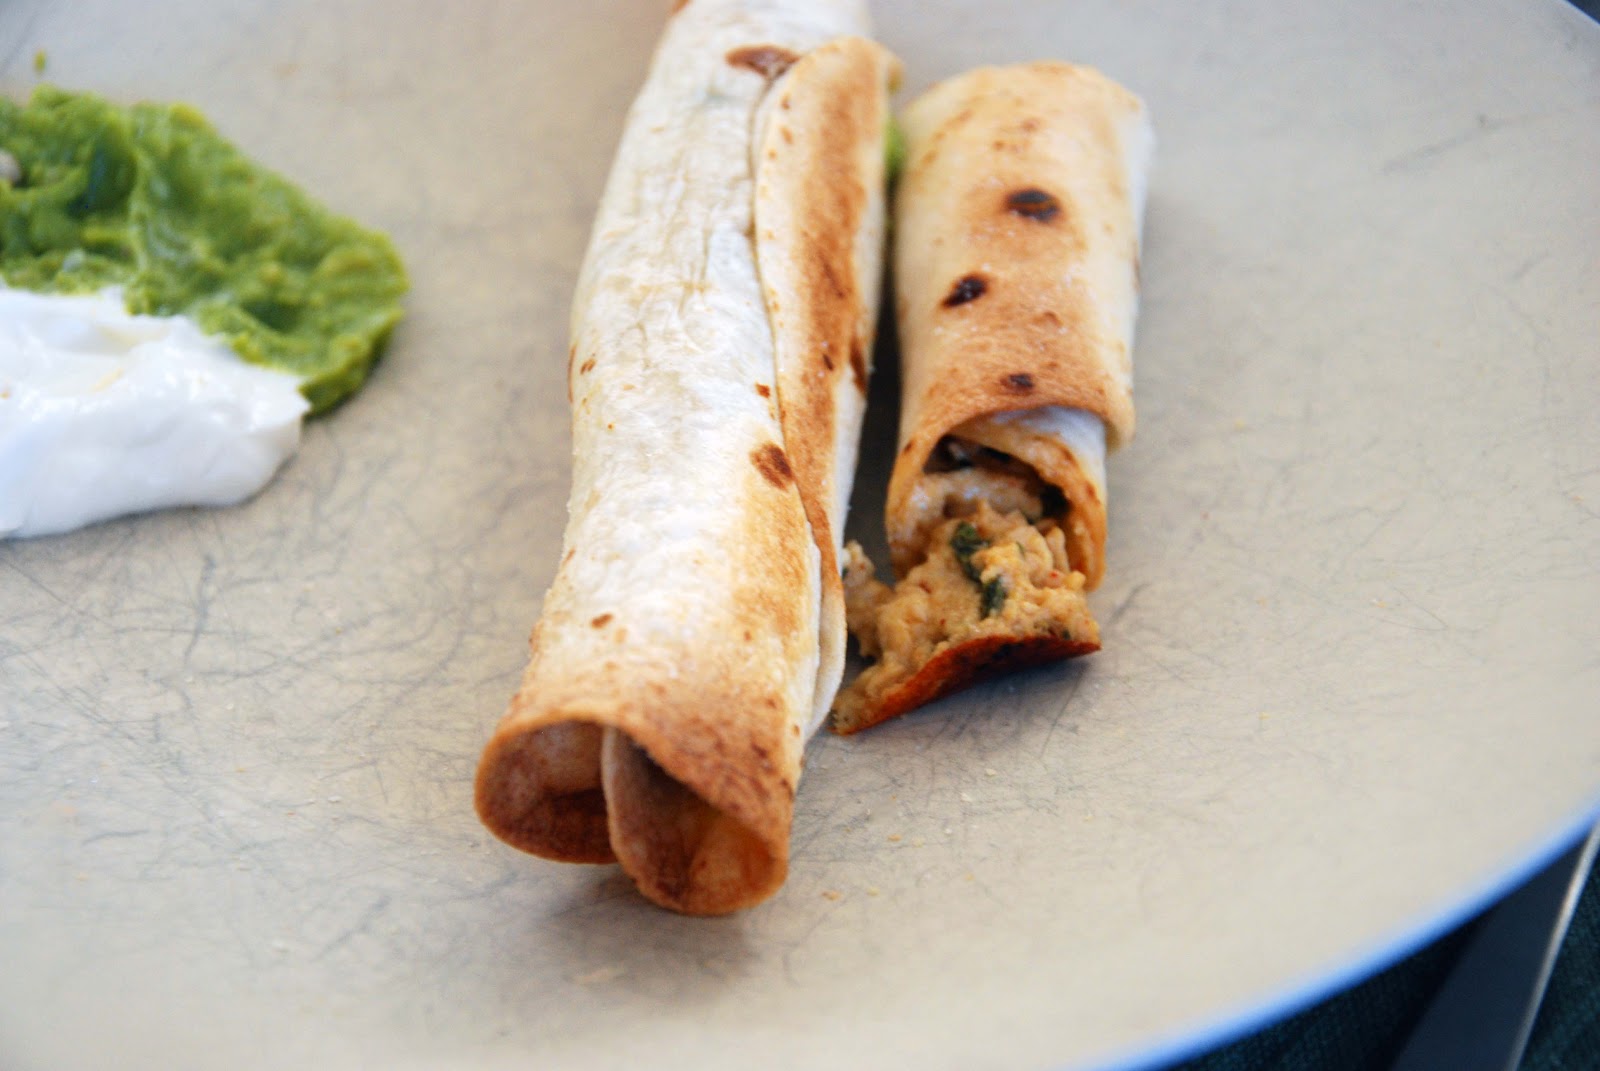
Baked Creamy Chicken Taquitos


AND WE HAVE A WINNER!!!  It's so nice when I kids really enjoy the meal I make.  They are extremely picky & some nights I wonder why I even cooked when they would be much happier with chicken nuggets.  But this doesn't happen when I make these Taquitos.  All 3 of my kids eat at least 2 & are always telling me how much they love this dinner.


Baked Creamy Chicken Taquitos


  • 3oz cream cheese, softened
  • 1/4c green salsa
  • 1T fresh lime juice (1/2 a lime)
  • 1/2t ground cumin
  • 1t chili powder
  • 1/2t onion powder
  • 2 cloves garlic, minced
  • 3T chopped cilantro
  • 2T sliced green onions
  • 2C shredded cooked chicken
  • 1c shredded Mexican flavored cheese
  • 12 small flour tortillas (I buy the raw tortillas & cook them myself.  They taste so much better & they're easier to roll)
  • salt
  • cooking spray

Preheat your oven to 425'F.  Line a baking sheet with wax paper.  In a large bowl, mix the cream cheese, salsa, lime juice, ground cumin, chili powder, onion powder & garlic.  Once combined, stir in the cilantro & green onions.  Add the chicken and cheese; mix thoroughly.

Working with a few tortillas at a time, heat them in the microwave between two paper towels until they are soft enough to roll (about 20-30 seconds).  It you are using the raw tortillas, cook them & then you won't have to reheat them in the microwave.

Spoon 2-3T of the chicken mixture onto the lower third of a tortilla.  Roll the tortilla as tightly as you can.

Place the rolled tortillas, seam side down, on the baking sheet.  Repeat with the remaining tortillas, until the mixture is gone.

Make sure the taquitos are not touching each other. 

Spray the tops lightly with cooking spray & sprinkle with a little salt.  

Bake for 15-20 minutes or until crisp & golden.

Serve with salsa, sour cream & guacamole.


Recipe from Chef in Training

Sunday, June 17, 2012

Baked Mozzarella Sticks


So I LOVE Mozzarella Sticks but I don't love the fat.  These sticks are great because they are baked & you can use low-fat cheese to make them even healthier.  Pair them with my Quick & Easy Marinara Sauce & you've got the perfect snack for any party.  You can even freeze them in large batches for future use.  


Baked Mozzarella Sticks
Servings: 12  Serving Size: 2 pieces  Calories: 86.8  Fat: 4.8g
Protein: 7.4g  Carbs: 3.5g  Fiber: 0.2g  Sugar: 0.2g   Sodium: 168.6  


  • 12 sticks part-skim, reduced sodium mozzarella string cheese (Sargento)
  • 1 large egg, beaten
  • 2T flour
  • 5T Italian seasoned breadcrumbs
  • 5T Panko crumbs
  • 2t parmesan cheese
  • 1T dried parsley
  • olive oil cooking spray 
    Cut cheese in half to give you 24 pieces.  Place the cheese in the freezer until cheese is frozen.

    In a small bowl, whisk the egg.  Place the flour on another small dish.  In a separate bowl, combine bread crumbs, panko, parmesan cheese & dried parsley.

    Dip the frozen sticks in the flour, shaking off the excess, then into the egg, then coat with the crumbs.

    Repeat this process with the remaining cheese placing them on a tray with wax paper.  Place the cheese back into the freezer until ready to bake (this is a must or they will melt before the crumbs get golden).

     When ready to bake, preheat the oven to 400'F.  Line a baking sheet with aluminum foil & lightly spray with oil.

    Place frozen cheese sticks on the baking sheet.  Spray the tops of the mozzarella sticks with a little more oil and bake in the bottom 3rd of your oven until crisp, about 4-5 minutes.  Turn and bake and additional 4-5 minutes, watching then closely so they don't melt.

Makes 24 pieces


Friday, May 18, 2012

Cilantro Lime Shrimp Tacos


Cilantro Lime Shrimp Tacos
Calories: 264;   Total Fat: 5.8g;   Saturated Fat: 0.4g;  
 Cholesterol: 850mg;   Sodium: 850mg;   Carbohydrate: 23g;  
 Dietary Fiber: 4.6;   Sugars: 6g;   Protein: 30.2g


  • 1lb frozen shrimp, defrosted, peeled & deveined
  • 6oz fat free plain Greek yogurt
  • 1/4c chopped cilantro
  • 2T fresh lime juice
  • 1/2 t cayenne pepper
  • 1/2 a head cabbage, thinly sliced (about 5 cups)
  • 8 corn tortillas
  • 4t extra virgin olive oil
  • salt & pepper to taste

Heat tortillas over medium heat in a dry skillet until warm and starting to form small brown spots. Set aside on a plate covered with a clean kitchen towel.

Mix yogurt, cayenne, lime juice, cilantro, & salt in a small bowl, set aside.

Heat two teaspoons of olive oil in a medium non-stick skillet and add cabbage.  Cook for about four minutes or until the cabbage is just barely wilted.  Season with salt and pepper and set aside.
Cut shrimp into thirds, so you have little bite size pieces.  Sauté in two teaspoons of olive oil and season with salt, pepper and a dash of cayenne pepper over medium heat just until done.  They cook up in just a few minutes… so be sure to watch them!
Build your taco!  Place a scoop of cabbage on the warmed tortillas taco, then top with shrimp, and cilantro sauce… enjoy!


Wednesday, May 2, 2012

Growing Green Onions

I probably use green onions once a week in my meals.  That being said, I only ever need 2 or 3 green onions but I have to buy them in bundles of something like 10.  I hate wasting food so I throw the extras into my vegetable bin & there they sit until they become wilted & slimy & then I throw them away. 

Well, I'm happy to say that I no longer throw them away (or buy them).  This little trick is something that my sister found on Pintrest & I had to try.  Check out the results.


Day 3
I didn't take a photo of when I first cut them because honestly I didn't think it would work.  
You can see where the onion was originally cut, though.

Day 8


Day 11


To try this, you'll want to cut & use the green but leave the white part of the onion.  Put the white part into a cup of water so that the ball part is covered but the cut end is in the air.  As long as you keep the water filled, the roots will grow & so will the onion.

I've since used all the green 3 or 4 times.  It's starting to not grow as quickly so I'm guessing eventually I'll have to throw these ones away & buy new ones.

Thursday, April 26, 2012

Black Bean & Corn Salsa Chicken Tacos

This is an extremely easy recipe to make & it freezes really well.  I like to make a double batch & then freeze half for when I need a quick meal.


Black Bean & Corn Salsa Chicken Tacos


  • 2 cans black beans, drained & rinsed
  • 1 cans corn, drained
  • 1 package taco seasoning
  • 4-5 chicken breasts
  • 1c salsa
  • 3/4c water

Put the beans, corn, taco seasoning & water in a crock pot & mix together until the seasoning is dissolved.  Place the chicken breasts on top & spread salsa on the chicken.  Cook on high for about 4 hours.  Shred the meat & serve with home cooked taco shells & whatever taco toppings you like.  We used cheese, sour cream lettuce, avocados, tomatoes & hot sauce.